
In This Article You Can Learn How To Create Random Phone Numbers Tool. There are many modern tools to make life easier. Random phone numbers generators, for example, can be very useful. They can create a random number anytime, making them useful when testing, or for when you need to generate a fake phone number for privacy or for signing up for apps.
This blog will teach you how to make your own random phone numbers generator tool. This tool allows us to easily create fake phone numbers. ChatGPT will be used to guide us and help make the tool smarter.
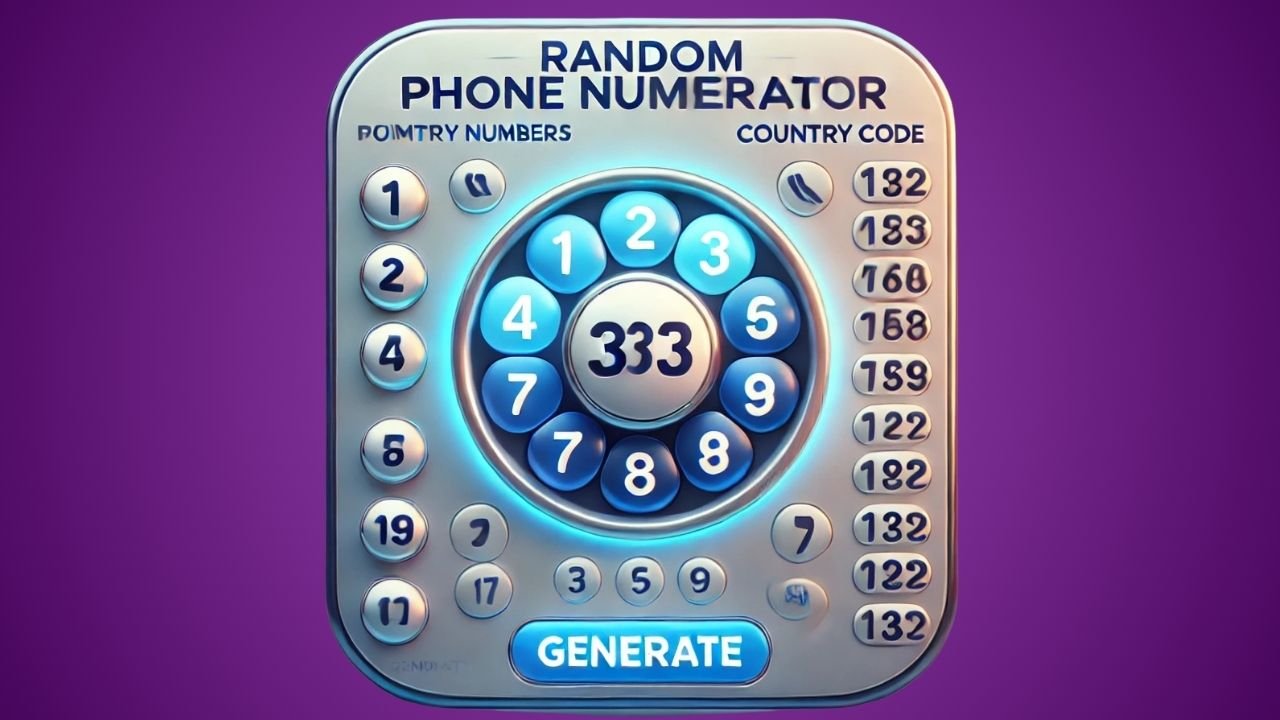
This tool can be used on your app or website to allow users to create random numbers.
Table of Contents
Step 1: Create A Plan For Tool Functionality
We need to know how the tool will function before we begin building it. We can do this by breaking it into smaller parts:
Determine The Purpose:
- This tool’s main function is to create Random random numbers. The phone numbers generated can be used to test apps, create fake accounts or keep your real number private.
- Consider whether the tool should generate statistics for multiple countries or a single country.
Different Types of Telephone Numbers:
- Local numbers: These are telephone numbers that can be found within specific countries, such as a 10 digit number for the USA.
- Numbers International: You may want to add country codes like +44 or +1 in the UK and the USA, so that users can create numbers for different countries.
Allow User Input:
Would you like to allow users to customize their own phone numbers? You can, for example:
- Choose a country (e.g. +1 for USA or +44 for UK).
- Select the length of your phone number.
- By allowing users to enter these specifics, the tool can be made more flexible.
Random Number Generation:
- It is necessary to have a program that will generate phone numbers at random, in the right format. If we wanted a 10 digit number it would look something like: (123)456-7890.
- This tool will generate fake numbers, which are real-looking but not assigned to anybody.
User-Friendly Features:
- It is essential that the interface of the tool be simple, clean and easy to use. It could be:
- The button will generate a brand new number.
- Dropdown menu for Country Codes
- Display box for the generated number.
Step 2: Setting Up The Environment
We need to prepare everything to create our tool. How to build it step-by-step:
Select Your Tools and Technologies
To create our random number generator, we will need to select a few tools:
Frontend (User interface):
- Here is the interface that users will interact with.
- Use HTML to structure your webpage, CSS for styling the page and JavaScript for adding functionality like random numbers.
Backend (Server-side Processing):
- You can also use the backend to add more advanced features or store generated numbers.
- Python or Node.js are both good choices for a backend.
- You might only need the backend for basic tools, such as generating numbers in the frontend.
Setting up a Local Development Environment
- Install text editor Download and install VS code, Sublime text for writing your code.
- Download Node.js: If you are using Node.js as a backend, go to the official Node.js website. Then download the most recent version. You can now run JavaScript also on the server.
- Download the Python Latest Version.
Create Project Folder
Create a folder in your computer to store the tools files. You can call it, for example “PhoneNumberTool”.
Create the following files inside this folder:
- index.html: This file contains the structure for your website (where you will display the phone number).
- style.css: This file contains the styles of your webpage (colors and buttons).
- script.js will take care of the logic to generate the phone number.
APIs (Optional)
- You can use an API to verify phone numbers and make your tool more intelligent. Numverify.
- Sign up for a key by visiting Numverify.
- This API allows you to verify that the phone number generated is compliant with international rules for phone numbers.
- Install API libraries: You’ll need to use Axios, Requests to get data from API.
Web Hosting (Optional)
- You can host your tool on platforms like strong>GitHub Pages/strong> (for static sites) or’strong>Heroku’ (for dynamic sites with a backend). You can do this by hosting your tool using platforms such as GitHub pages for static sites or Heroku for dynamic sites.
You’re now ready to build and test your random number generator.
We plan these features to ensure that our tool meets the users’ needs, regardless of whether the user is looking for a test number or if they are concerned about privacy.
Step 3: Writing Code for Phone Number Generator
It’s now time to create the code for generating random numbers. We’ll make it easy to understand by breaking it down into simple steps.
The Code and How it Works
You want:
- Create random numbers using the right format.
- Users can choose to customize their number formats or include the country code.
- The generated number will be displayed on screen.
Step-by-Step Guide to Writing the Code
1. Basic Random Number Generator
Start with the easiest code to generate a 10-digit random phone numbers.
javascript function generatePhoneNumber() { const areaCode = Math.floor(Math.random() * 900) + 100; // Generates a random 3-digit number const centralOfficeCode = Math.floor(Math.random() * 900) + 100; // Another random 3-digit number const lineNumber = Math.floor(Math.random() * 9000) + 1000; // Random 4-digit number return `(${areaCode}) ${centralOfficeCode}-${lineNumber}`; // Format the number } console.log(generatePhoneNumber());What is Happening?
Math.random(): Generates a random decimal number between 0 to 1.Math.floor(): Converts a decimal to a whole.- Multiply and add the numbers in order to get a range of output (e.g. 100-999 for three digits).
2. Add A Country Code
You can include a dropdown menu for users to choose a country code. For example, +1 is for USA and +44 is for UK.
javascript function generatePhoneNumberWithCountryCode(countryCode) { const areaCode = Math.floor(Math.random() * 900) + 100; const centralOfficeCode = Math.floor(Math.random() * 900) + 100; const lineNumber = Math.floor(Math.random() * 9000) + 1000; return `${countryCode} (${areaCode}) ${centralOfficeCode}-${lineNumber}`; } // Example usage: console.log(generatePhoneNumberWithCountryCode("+1")); // +1 (123) 456-78903. Connect Code to HTML (User Interface)
Create a webpage that allows users to click on a button and generate a telephone number.
HTML code (index.html):
html <!DOCTYPE html> <html lang="en"> <head> <meta charset="UTF-8"> <meta name="viewport" content="width=device-width, initial-scale=1.0"> <title>Random Phone Numbers Generator</title> <link rel="stylesheet" href="style.css"> </head> <body> <div> <label for="countryCode">Choose Country Code:</label> <select id="countryCode"> <option value="+1">+1 (USA)</option> <option value="+44">+44 (UK)</option> <option value="+91">+91 (India)</option> </select> <button onclick="displayPhoneNumber()">Generate Phone Number</button> <p id="result"></p> </div> <script src="script.js"></script> </body> </html>JavaScript Code (script.js):
javascript function displayPhoneNumber() { const countryCode = document.getElementById("countryCode").value; const randomPhoneNumber = generatePhoneNumberWithCountryCode(countryCode); document.getElementById("result").textContent = randomPhoneNumber; } function generatePhoneNumberWithCountryCode(countryCode) { const areaCode = Math.floor(Math.random() * 900) + 100; const centralOfficeCode = Math.floor(Math.random() * 900) + 100; const lineNumber = Math.floor(Math.random() * 9000) + 1000; return `${countryCode} (${areaCode}) ${centralOfficeCode}-${lineNumber}`; }4. Add Patterns or Validation Optionally
You can validate the number if you need to make sure it follows certain rules, e.g. valid prefixes in certain countries.
- Validate phone numbers using ChatGPT, an API or an API.
- Compare the numbers generated with known patterns in different countries.
What Happens When You Run This Code?
- Select a code for the country from the drop-down menu.
- Click the button “Generate phone number”
- Below the button, a random number of the country code selected will appear.
This code will allow you to create a random number generator that is fully functional!
Step 4: Integrate ChatGPT to Enhance Your Experience
ChatGPT can be integrated to make random number generators smarter, more interactive and better. ChatGPT can be integrated to perform tasks such as validating numbers, explaining generator logic, and even customizing formats of phone numbers for the users.
Why Integrate ChatGPT Into Your Business?
- Validation: ChatGPT checks if a number generated is valid by comparing it to patterns in specific countries.
- User Interaction: ChatGPT allows users to interact with the system by asking questions about how it works, or requesting specific features such as adding new countries codes.
- ChatGPT offers smart customization: ChatGPT suggests new formats and guides users in how to personalize the tool.
Integrating Step by Step Guide
1. OpenAI API Key: Get Yours Now
- Open the OpenAI website.
- Log in or sign up to receive your API Key.
- The key allows your application to send chat requests to ChatGPT.
2. Install The Necessary Libraries
Install libraries for your backend language to interact with OpenAI’s API.
For Node.js, install axios:
bash npm install axiosFor Python, install openai:
bash

pip install openai
3. Integrate ChatGPT to Validate Numbers
This is an example on how you can use ChatGPT for validating a number to see if the pattern matches what’s expected:
Node.js Example:
javascript const axios = require('axios'); async function validatePhoneNumber(number) { const apiKey = "your-openai-api-key"; // Replace with your OpenAI API key const response = await axios.post( 'https://api.openai.com/v1/chat/completions', { model: "gpt-3.5-turbo", messages: [ { role: "system", content: "You are a phone number validation assistant." }, { role: "user", content: `Validate this phone number: ${number}` } ] }, { headers: { Authorization: `Bearer ${apiKey}` } } ); return response.data.choices[0].message.content; } // Example usage: validatePhoneNumber("(123) 456-7890").then(console.log); Python Example:
python import openai openai.api_key = "your-openai-api-key" # Replace with your OpenAI API key def validate_phone_number(number): response = openai.ChatCompletion.create( model="gpt-3.5-turbo", messages=[ {"role": "system", "content": "You are a phone number validation assistant."}, {"role": "user", "content": f"Validate this phone number: {number}"} ] ) return response['choices'][0]['message']['content'] # Example usage: print(validate_phone_number("(123) 456-7890")) 4. Add ChatGPT to User Interaction
ChatGPT allows users to directly ask questions about the tool. You can, for example, ask:
- Can this tool produce UK numbers?
- What does area code mean in US numbers?
Use this example to interact with users (Frontend + chatGPT).
HTML:
html <div> <textarea id="userInput" placeholder="Ask ChatGPT a question"></textarea> <button onclick="askChatGPT()">Ask ChatGPT</button> <p id="chatResponse"></p> </div> JavaScript:
javascript async function askChatGPT() { const userQuestion = document.getElementById("userInput").value; const apiKey = "your-openai-api-key"; // Replace with your OpenAI API key const response = await fetch("https://api.openai.com/v1/chat/completions", { method: "POST", headers: { "Content-Type": "application/json", Authorization: `Bearer ${apiKey}` }, body: JSON.stringify({ model: "gpt-3.5-turbo", messages: [ { role: "system", content: "You are a helpful assistant for a phone number generator tool." }, { role: "user", content: userQuestion } ] }) }); const data = await response.json(); document.getElementById("chatResponse").textContent = data.choices[0].message.content; } 5. Test Integration
Test the scenarios below once integrated:
- ChatGPT will respond to different numbers.
- ChatGPT can answer questions such as “Can I create a 12-digit phone number?” and “What is the format of Canadian telephone numbers?”
- Make sure the answers are helpful and accurate.
Final Results About Integrate ChatGPT to Enhance Your Experience
ChatGPT integration transforms your random number generator into an interactive assistant. The tool becomes more user-friendly and engaging when users can create numbers, verify them and receive explanations and guidance.
Step 5: Build The User Interface (UI)
User Interface is the interface that users interact with. The UI of your tool should be simple and easy to understand. How to create the UI in steps.
1. Basic Layout
Create an interface using the elements below:
- Select the Country Code from the dropdown menu.
- The Generate button is used to generate a random number.
- Display box Shows the generated number.
- Users can ask questions in the ChatGPT interactivity box.
2. HTML Structure
This is the structure of your website:
html <!DOCTYPE html> <html lang="en"> <head> <meta charset="UTF-8"> <meta name="viewport" content="width=device-width, initial-scale=1.0"> <title>Random Phone Numbers Generator</title> <link rel="stylesheet" href="style.css"> </head> <body> <div class="container"> <h1>Random Phone Numbers Generator</h1> <!-- Country Code Dropdown --> <label for="countryCode">Choose Country Code:</label> <select id="countryCode"> <option value="+1">+1 (USA)</option> <option value="+44">+44 (UK)</option> <option value="+91">+91 (India)</option> </select> <!-- Generate Button --> <button id="generateBtn" onclick="displayPhoneNumber()">Generate Phone Number</button> <!-- Display Box --> <p id="resultBox">Your phone number will appear here...</p> <!-- Optional ChatGPT Box --> <div class="chat-section"> <textarea id="chatInput" placeholder="Ask ChatGPT about the tool..."></textarea> <button onclick="askChatGPT()">Ask ChatGPT</button> <p id="chatResponse"></p> </div> </div> <script src="script.js"></script> </body> </html>3. Style with CSS
Style the page visually:
CSS Code (style.css):
css /* General Reset */ body { font-family: Arial, sans-serif; margin: 0; padding: 0; background-color: #f9f9f9; color: #333; display: flex; justify-content: center; align-items: center; min-height: 100vh; } .container { width: 90%; max-width: 500px; background: #fff; padding: 20px; border-radius: 10px; box-shadow: 0 4px 6px rgba(0, 0, 0, 0.1); text-align: center; } h1 { color: #47055C; /* Use your preferred heading color */ margin-bottom: 20px; } label { font-weight: bold; margin-bottom: 10px; display: block; } select, button, textarea { width: 100%; margin: 10px 0; padding: 10px; border: 1px solid #ccc; border-radius: 5px; font-size: 16px; } button { background-color: #47055C; color: #fff; cursor: pointer; transition: background-color 0.3s; } button:hover { background-color: #5a1b70; } #resultBox, #chatResponse { margin: 15px 0; padding: 10px; border: 1px solid #ccc; border-radius: 5px; background-color: #f1f1f1; } textarea { height: 100px; resize: none; } .chat-section { margin-top: 20px; text-align: left; }4. Add JavaScript to Functionality
Basic functionality: After clicking “Generate”, a result box should display a telephone number.
JavaScript code (script.js):
javascript // Generate and display the phone number function displayPhoneNumber() { const countryCode = document.getElementById("countryCode").value; const randomPhoneNumber = generatePhoneNumberWithCountryCode(countryCode); document.getElementById("resultBox").textContent = randomPhoneNumber; } // Generate a random phone numbers function generatePhoneNumberWithCountryCode(countryCode) { const areaCode = Math.floor(Math.random() * 900) + 100; const centralOfficeCode = Math.floor(Math.random() * 900) + 100; const lineNumber = Math.floor(Math.random() * 9000) + 1000; return `${countryCode} (${areaCode}) ${centralOfficeCode}-${lineNumber}`; } // Optional: ChatGPT integration async function askChatGPT() { const userQuestion = document.getElementById("chatInput").value; const apiKey = "your-openai-api-key"; // Replace with your OpenAI API key const response = await fetch("https://api.openai.com/v1/chat/completions", { method: "POST", headers: { "Content-Type": "application/json", Authorization: `Bearer ${apiKey}` }, body: JSON.stringify({ model: "gpt-3.5-turbo", messages: [ { role: "system", content: "You are a helpful assistant for a phone number generator tool." }, { role: "user", content: userQuestion } ] }) }); const data = await response.json(); document.getElementById("chatResponse").textContent = data.choices[0].message.content; }5. Test your UI
- Click on the Index.html link in your web browser.
- Click “Generate Phone number” and select a country code to generate the phone number.
- You can type a question into the chatGPT box to see the answer.
The Final Result About The User Interface (UI)
Now your user interface will be functional, intuitive, and appealing. The tool is easy to use and offers features such as random number generation and country code selection. Users can even ask ChatGPT questions.
Please Note:
Use Html Viewer Online Tool For Free See Your Code Live Online And Check Result Instantly.
Step 6: Launch and Deploy
It’s now time to share your tool with others. The next step is to upload your random phone numbers generator tool onto a web hosting platform. This is how to do it in a step-by-step manner.
1. Prepare Your Files
Before deployment:
1. Make sure your project folder has all necessary files.
- index.html: Main webpage.
- Style.css: CSS style sheet.
- script.js: JavaScript for functionalities.
2. Test that the tool works locally.
2. Choose a Hosting Platform
You can host your tool on a variety of platforms. These are popular options for beginners:
Option 2: GitHub Pages for Free
Static Websites (HTML/CSS/JavaScript) without Backend.
Take the following steps to get started:
- If you do not already own a GitHub account, create one.
- Create a repository for your project.
- You can upload all of your files into the repository.
Enable the repository settings GitHub Pages:
- Scroll to “Pages”.
- Choose the folder to deploy (usually root).
- You can access your website at: https:// .github.io/ / .
Option 3: Easy and Free Netlify
Best for: Dynamic and static sites
Take the following steps to get started:
- Sign up at Netlify.
- Drag your project into Netlify dashboard.
- Netlify will deploy your site and provide you with a free URL (e.g., https://your-site.netlify.app).
Option 3: Vercel
Best for: Dynamic and static sites that have a professional feel.
Take the following steps to get started:
- Sign Up at Vercel.
- Your GitHub repository or GitLab repository can be linked.
- Vercel automatically launches your project, and provides a URL for free.
Option 4: Heroku (For Backends)
Best for: Projects requiring a server (e.g. using Node.js, Python or Ruby).
Take the following steps to get started:
- Sign Up at Heroku.
- Install Heroku Command Line Interface in your computer.
- Use the following commands to run your project:
BashCode Copyheroku login heroku create git push heroku main - You can access your tool at: https:// .herokuapp.com/ .
3. Add a Custom Domain (Optional)
You can make your website more professional by adding a custom-made domain.
- Buy a domain from a provider like Namecheap, or Google Domains.
- The instructions for each platform will vary.
4. Test Your Live Website
Once deployed:
- Click on the link that your host platform has provided.
- Make sure your tool works exactly as you expect it to.
- Test the responsiveness of your device (such as on mobile).
5. Launch and Promote
Share your tool after deployment with other people!
- Share to Social Media Post on Twitter, LinkedIn or Facebook, with a short description and link.
- Share on Forums. You can share your tools on sites like Reddit.
- Send Email to Friends/Colleagues : You can send an email and request feedback from your friends or colleagues.
- Showcase Your Tool in Your Portfolio If you are a programmer, show off your tools.
6. Maintain and Update
When your application is online:
- Check for bugs regularly and correct them.
- Add features that are based on feedback from users (e.g. more formats, country codes).
- Update your libraries and APIs if they are dependent on them.
Final Result Launch and Deploy
Now that your random number generator is live, it’s available to all! It can be a useful tool for many users with proper updates and promotion. You’ve completed the project. Congratulations!
Please Note:
See Result Click On link Check Live Random Phone Numbers Generator Online Tool By Using Chat GPT to Create This Tool: Random Phone Numbers Generator.
Step 7: Understanding The Hosting
Renting space to show your tool on the Internet is hosting. Your tool’s level of complexity will determine how you host it.
- Static tools: (HTML/CSS/JavaScript) Use platforms such as GitHub Pages and Netlify.
- Dynamic tools: (with a backend such as Node.js, Python or Node.js) Use platforms such as Vercel or Heroku.
2. Hosting Your Tool
Option 1: GitHub Pages (Free and Simple)
The Best for Static Tools without Backend
Prepare files Ensure that all the necessary files (e.g. Index.html Style.css and Script.js) are in a single folder.
Upload your files to GitHub:
- Upload your files to a GitHub repository.
- Use GitHub Desktop to drag and drop files or the web interface.
Enable GitHub Pages:
- Click on the settings for your repository.
- Select Pages and the folder
Rootto deploy. - You can Access Your Tool You will have your tool at
https:// .github.io/ /.
Option 2: Netlify (Free, Drag-and-Drop)
Best for: Quickly deployable static tools.
Create an Account on Netlify by going to Weblify.
- Drag and Drop:
- Drag and drop your entire project (including all files) onto the Netlify dashboard.
- Get Live Link: Netlify will generate a live link (e.g.,
https://your-tool.netlify.app). - Custom domain (Optional). You can link your own custom domain via the Netlify Dashboard.
Option 3: Vercel (Free for Dynamic and Static Tools)
Best for: Static and backend integrated tools.
Sign up : Visit Vercel to log in with GitHub.
Link Repository:
- Vercel allows you to import your GitHub repository.
- The environment will be automatically detected and configured based on the type of project.
Deploy: Vercel will deploy your tool and provide a live link (e.g., https://your-tool.vercel.app).
Option 4: Heroku (For Backend Tools)
Best for: Tools that offer backend services.
Create an Account.
Heroku Install CLI: Download the Heroku install CLI and install it.
Use Your Tool:
- Launch a terminal from your project directory.
- Use these commands to run the program:BashCode Copy
heroku login heroku create git push heroku main
You can Access Your Tool The tool you selected will go live on https:// .herokuapp.com/ .
3. Testing the Live Site
Test your tool after deployment to make sure it is working correctly.
- Compatible: Tests on various browsers and devices.
- Performance: Test loading speed and responsiveness.
- Error handling: Make sure features such as generating phone number or ChatGPT Integration work properly.
4. Promoting Your Tool
Share your tool with other people once it is online:
- Social media: Share on social networks like LinkedIn, Twitter or Facebook, with a short description.
- Forums: Share your tool in communities such as Reddit, Stack Overflow or Stack Overflow.
- Portfolio: You can add the tool to your portfolio as a developer to show off your work.
5. Maintaining and Updating
- Check your software for bugs and errors.
- New features can be added based on feedback from users (e.g. more country codes or UI improvements).
- Keep your tool functional and secure by updating APIs and dependencies as necessary.
Final Result About Hosting
Your tool is now ready for sharing with the rest of the world. The deployment of your tool marks the start of its journey. It allows you to help and reach users worldwide. Congratulations!
Please Note:
If You Interested How AI Death Calculator Works And What is Ai Death Calculator Reality Click on This link And Read More About AI Death Calculator.
Conclusion
It is a rewarding and exciting journey to create a random number generator using ChatGPT. You’ve learned the steps necessary to build a useful online tool. You’ve used a structured method to create a tool which generates random numbers and enhances the functionality of ChatGPT. It also provides an intuitive interface.
Takeaways
- Planing Is Important: A clear vision with defined functionalities will ensure that the project is on track.
- Setup the Environment: A good setup will simplify the development process.
- Write Efficient Code: By breaking tasks down into smaller parts (such as number generation or ChatGPT Integration), the code can be more easily managed.
- Designing an Interface: A user-friendly interface is essential for your tool to be accessible and engaging.
- Deployment and Hosting: Making your tool available online will give it real value. It also opens up the world to you.
Why This Project is Important
It’s not only about creating phone numbers, but also about using technology to creatively solve problems. This project demonstrates the potential of using advanced AI technology like ChatGPT to combine simple coding with ChatGPT for testing software or generating data.
The Next Steps
Your tool has now been made live.
- Get feedback from the users and improve your product.
- Add more features to the program (e.g. adding additional country codes, or customizing output format).
- Encourage others by sharing your experience!
Last Words All The Tool
This tool represents a major achievement. This tool shows your ability to develop a project, conceptualize it, and then deploy it. Use this success as a springboard for bigger projects. Congratulations on finishing your Random Phone Numbers Generator!